Training a CNN
This section walks through a common deep learning task - training a Neural Network. WekaDeeplearning4j allows you to do this in one of two ways, both of which will be explained in this section: - Design your own architecture, specifying a custom layer setup - Use a well-known pre-defined architecture from the Model Zoo. Most models from the Model Zoo have the added benefit of a pre-trained option, which tends to improve generality and reduce the training required on your end to achieve good performance.
All datasets/models referenced in this tutorial can be found in the asset pack.
Starting Simple - The Iris Dataset (Tabular)
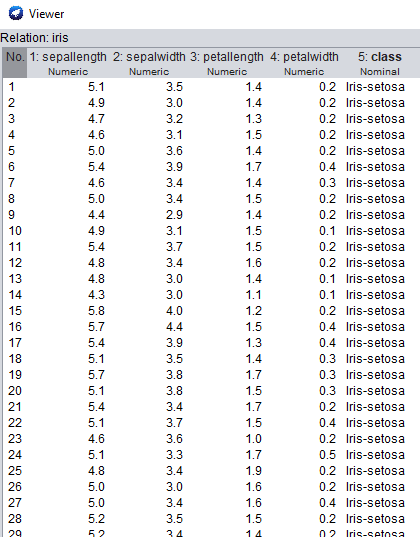
A very common dataset to test algorithms with is the Iris Dataset, a simple 4-attribute classification dataset. Although this is often used to demonstrate classical ML algorithms (e.g., boosting, decision trees), neural networks can also be applied to this style of dataset.
Dataset Sample
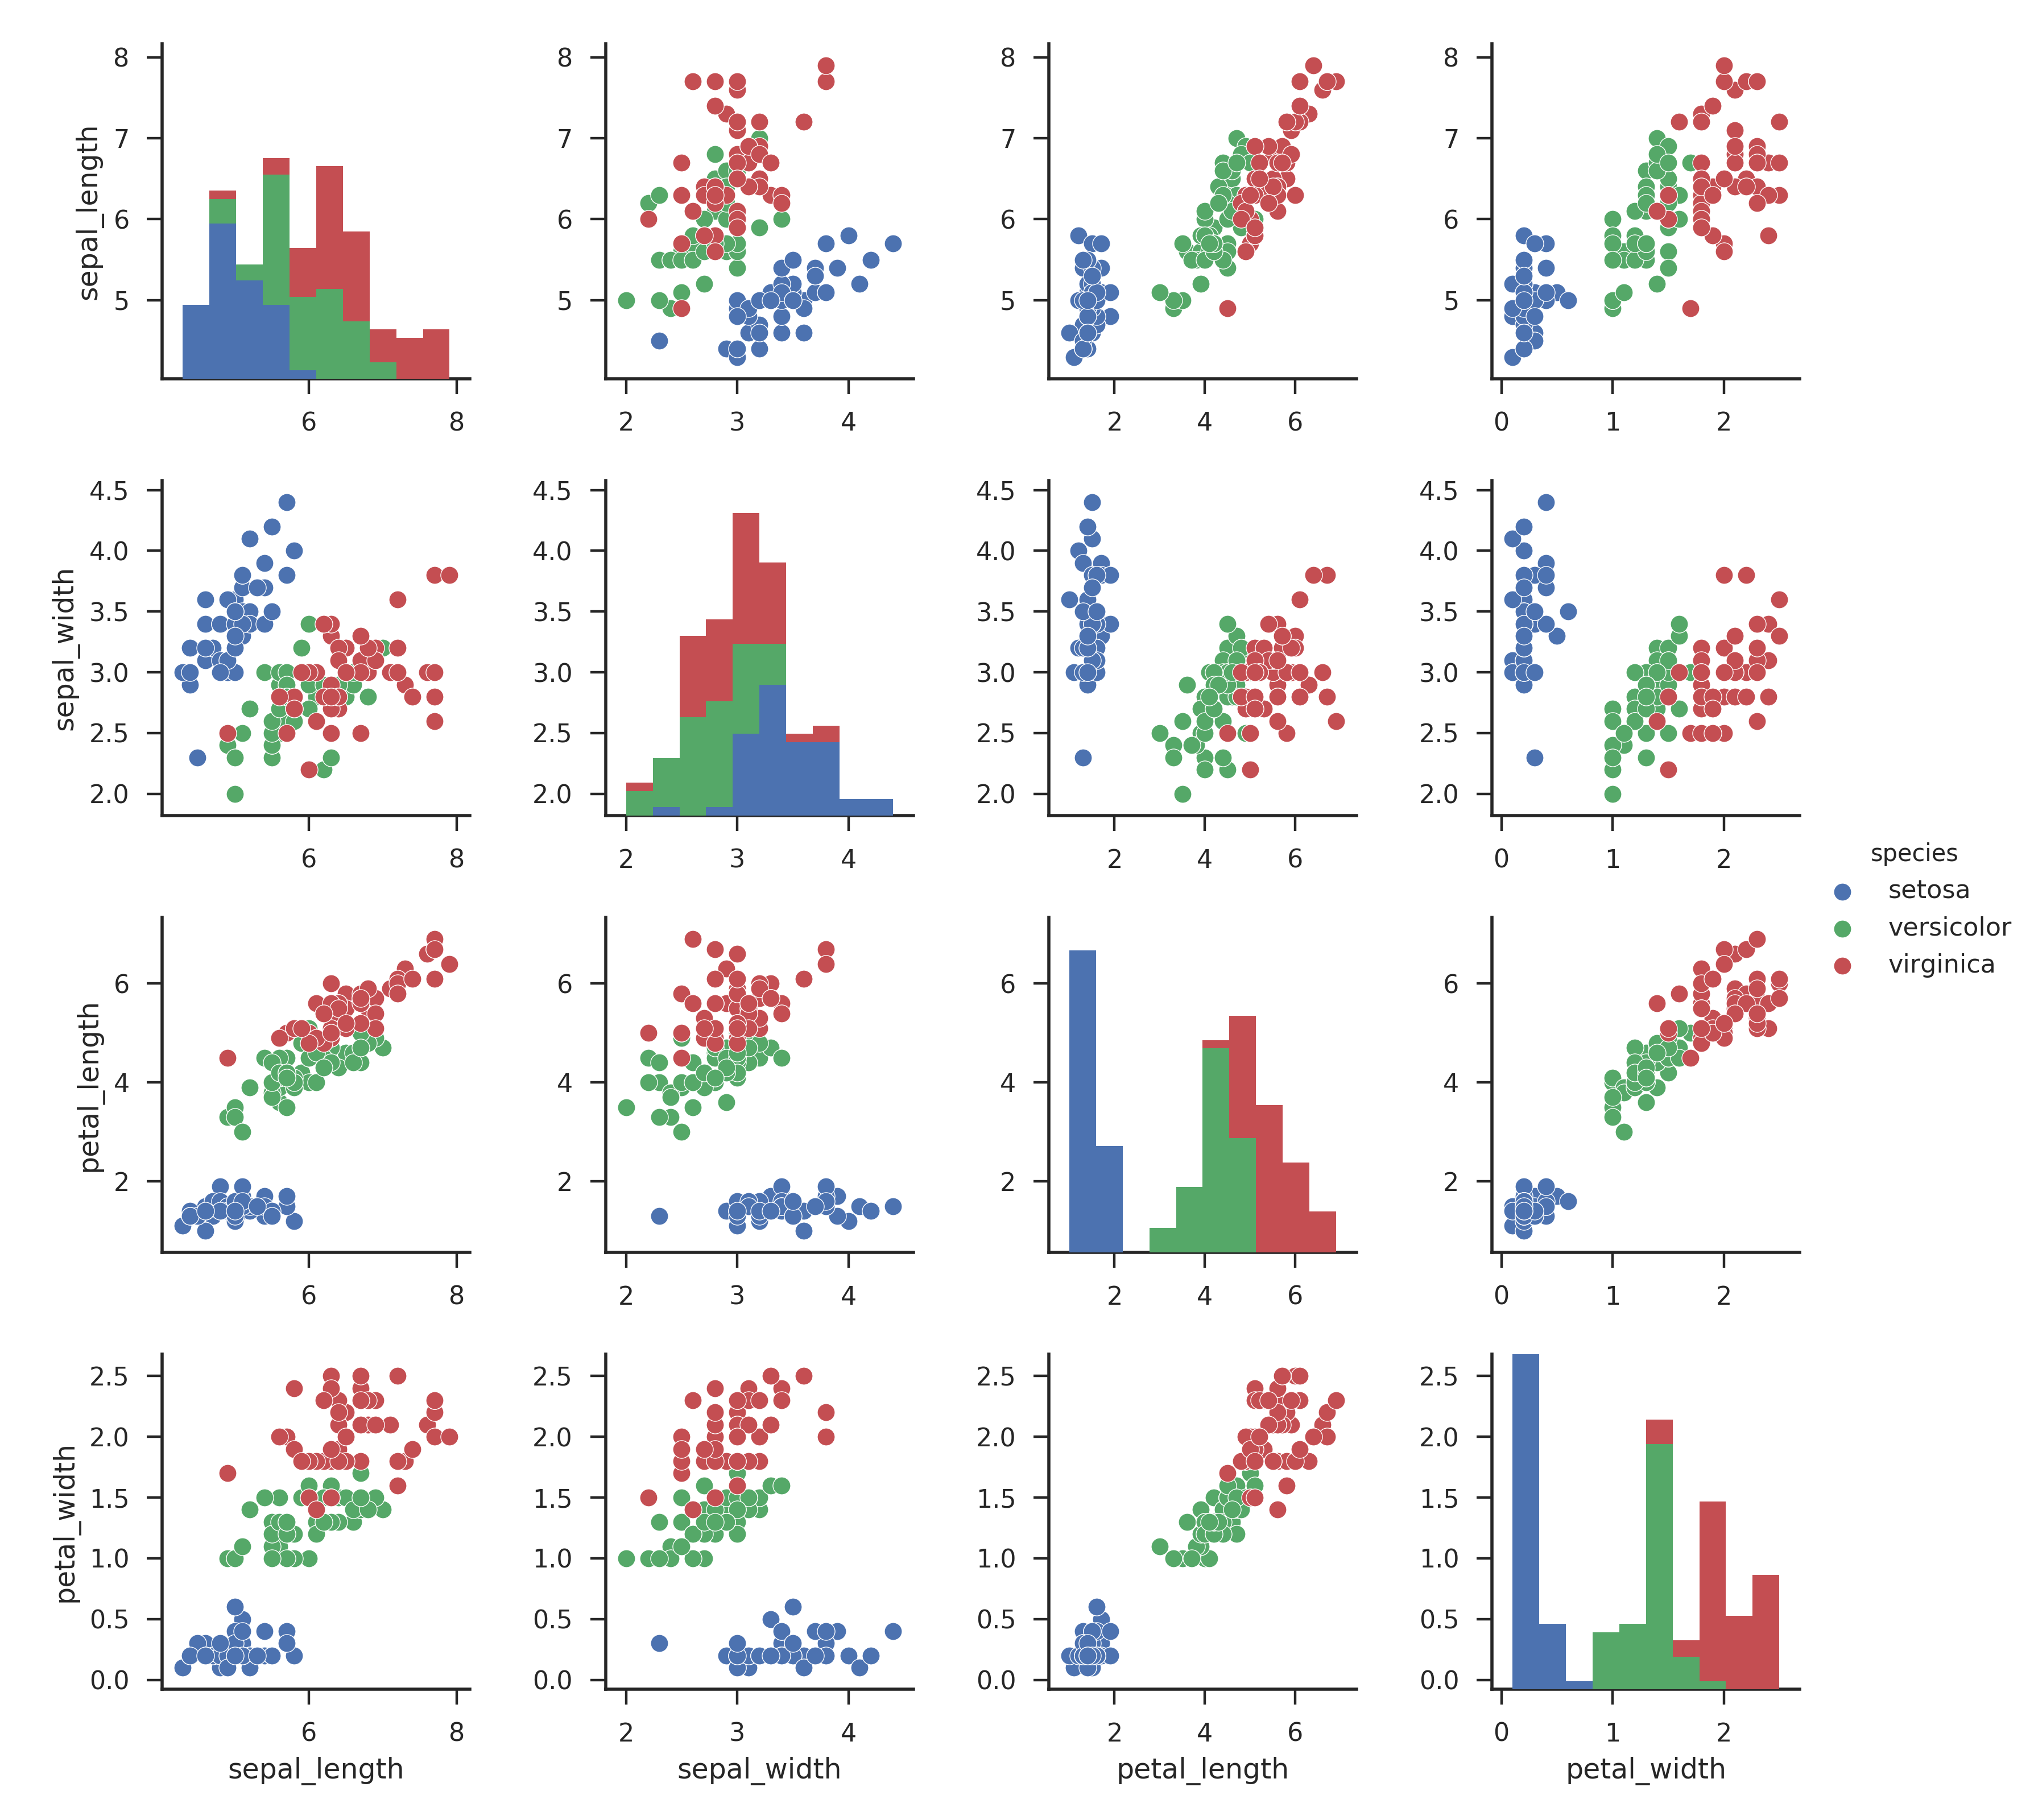
Dataset Distribution Visualisation
We're going to start with a simple network, progressively adding layers and noting the effect this has on performance & model size.
GUI
- Open the Weka Explorer, click
Open file...and open theiris.arffdataset. - Switch to the
Classifypanel, clickChoose, and selectfunctions>Dl4jMlpClassifieras the classifier. - Click
Startto begin training. You should see the Progress Manager show a progress bar indicating the progress and ETA. By default the classifier only has one layer (the output layer) but this does have trainable weights so can be fit to the dataset. Note the cross-validated accuracy.
We're now going to start adding some layers:
- Next to
Choose, click theDl4jMlpClassifierbox to open the classifier options - Click
layer specificationto open theGenericArrayEditor. From here we can edit the model's layers. - Click
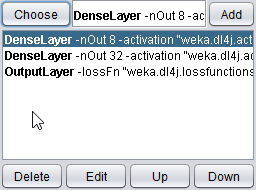
Chooseand select theDenseLayer. - Open the
DenseLayersettings and setnumber of outputsto32. - Click
Addto add the layer. You should see it appear above theOutputLayer - Click
OKto save the configuration and clickStartagain to see how the accuracy improves.
You'll note we've gone from 15 parameters, to 259 after only adding a single layer - neural networks can balloon in size very quickly as we add more layers!
- Finally add one more
DenseLayerwith8outputs.
Train the model again and you should see a minor improvement in accuracy again, but not as much as before. If you don't see an improvement don't worry - the point at this part of the tutorial isn't to get accurate classification, but rather as a mild introduction to creating neural networks.
You may notice it training the model many times; by default WEKA performs 10-fold cross-validation on your data. This trains 10 different classifiers on subsets of the data, then averages their performance for the final summary result. This is fine for smaller datasets & models but as we continue this tutorial and train larger models it may take too long. For the sake of this tutorial, a faster method is to do a training/test split on the loaded dataset.
- In
Test options, selectPercentage splitand set the%field to80. This will train the model on 80% of the data once, evaluating it on the remaining 20%.
Command Line
$ java weka.Run .Dl4jMlpClassifier \
    -layer "weka.dl4j.layers.DenseLayer -nOut 8" \
    -layer "weka.dl4j.layers.DenseLayer -nOut 32 " \
    -layer "weka.dl4j.layers.OutputLayer -nOut" \
    -t $WEKA_HOME/packages/wekaDeeplearning4j/datasets/nominal/iris.arff
    -split-percentage 80
Java
The same architecture can be built programmatically with the following Java code
// Load all packages so that Dl4jMlpFilter class can be found using forName("weka.filters.unsupervised.attribute.Dl4jMlpFilter")
weka.core.WekaPackageManager.loadPackages(true);

// Load the dataset
weka.core.Instances data = new weka.core.Instances(new FileReader("datasets/nominal/iris.arff"));
data.setClassIndex(data.numAttributes() - 1);
String[] classifierOptions = weka.core.Utils.splitOptions("-S 1 -numEpochs 10 -layer \"weka.dl4j.layers.OutputLayer -activation weka.dl4j.activations.ActivationSoftmax -lossFn weka.dl4j.lossfunctions.LossMCXENT\"");
weka.classifiers.AbstractClassifier myClassifier = (AbstractClassifier) weka.core.Utils.forName(weka.classifiers.AbstractClassifier.class, "weka.classifiers.functions.Dl4jMlpClassifier", classifierOptions);

// Stratify and split the data
Random rand = new Random(0);
Instances randData = new Instances(data);
randData.randomize(rand);
randData.stratify(3);
Instances train = randData.trainCV(3, 0);
Instances test = randData.testCV(3, 0);

// Build the classifier on the training data
myClassifier.buildClassifier(train);

// Evaluate the model on test data
Evaluation eval = new Evaluation(test);
eval.evaluateModel(myClassifier, test);

// Output some summary statistics
System.out.println(eval.toSummaryString());
System.out.println(eval.toMatrixString());
Starting Simple - The MNIST Dataset (Image)


This next section will walkthrough training a neural network on an image-classification dataset, using a cutdown version of the MNIST dataset, which provides images of handwritten digits of 10 classes (0-9). We'll also introduce you to the WekaDeeplearning4j Model Zoo.
GUI
- Back in the
Preprocesspanel, open themnist.meta.minimal.arffdataset.
Important note: You'll notice that the format of this dataset is quite different to the previous one. Whereas iris.arff specified all attributes explicitly, this version of MNIST only specifies the filename and its associated class; this is a much more common use case (especially for image classification) so it's important to understand how to work with this in WekaDeeplearning4j.
Going to the Classify panel, if you click Start WEKA will throw an error (...Dl4jMlpClassifier: Cannot handle string attributes). This is because we're using a 'meta-style' dataset which only contains filenames. We need to configure the Dl4jMlpClassifier further to handle this new type of dataset and tell it what to do with these filenames.
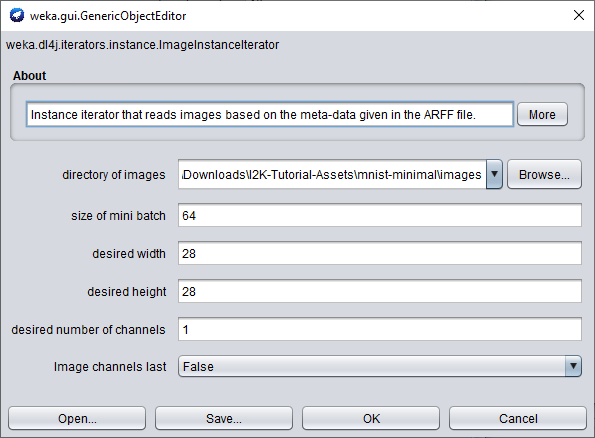
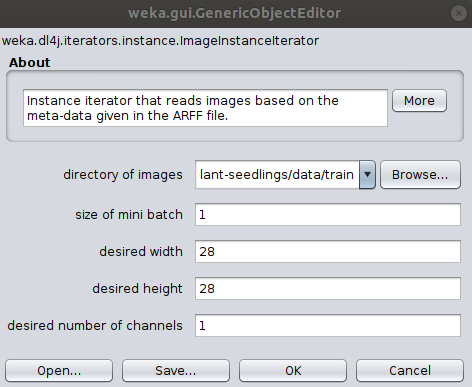
- In the Dl4jMlpClassifier settings, change the instance iterator from DefaultInstanceIterator to ImageInstanceIterator.
- In the ImageInstanceIterator settings, set the directory of images to mnist-minimal/images/ , and the size of mini batch to 64 (you can reduce this if you run into out-of-memory issues).
- Delete the 2 layers we previously added (leaving only the
OutputLayer) and clickStartto train your model.
Command Line
$ java weka.Run .Dl4jMlpClassifier \
    -iterator ".ImageInstanceIterator \
        -imagesLocation $WEKA_HOME/packages/wekaDeeplearning4j/datasets/nominal/mnist-minimal -bs 64" \
        -t $WEKA_HOME/packages/wekaDeeplearning4j/datasets/nominal/mnist.meta.minimal.arff \
        -split-percentage 80
You should get an accuracy ~71% which is OK considering the model is only using the single output layer. We won't go any further into custom architectures at this point but instead look at using a model from the WekaDeeplearning4j Model Zoo.
Fine-tuning a Zoo Model
WekaDeeplearning4j's Model Zoo contains a set of predefined state-of-the-art architectures which can be used on your dataset out-of-the-box. In addition, most of them include pre-trained weights so they often require less training to converge than training a model from scratch (with randomly-initialized weights).
As we're training on MNIST, it would make sense to use a pretrained model suited for this dataset. The LeNet architecture is one of the earliest CNN architectures proposed and was initially done so for use on the MNIST dataset. The Dl4jLeNet model included in WekaDeeplearning4j makes this (relatively) basic CNN architecture available, which we'll use for this section.
Note that the first time this is run the pretrained weights may need to be downloaded in which case actual runtime will be longer. These weights are cached locally so subsequent runs are faster.
GUI
- In the
Dl4jMlpClassifiersettings change thezooModelfromCustomNettoDl4jLeNet. - That's all you need to change! Click
Startto begin fine-tuning the pretrainedDl4jLeNetmodel.
You should get a marked improvement in accuracy over the previous (default layer-setup) model of ~88% with a single click - using pretrained models couldn't get much easier!
Commandline
$ java weka.Run .Dl4jMlpClassifier \
    -iterator ".ImageInstanceIterator \
        -imagesLocation $WEKA_HOME/packages/wekaDeeplearning4j/datasets/nominal/mnist-minimal -bs 64" \
        -zooModel ".Dl4jLeNet" \
        -t $WEKA_HOME/packages/wekaDeeplearning4j/datasets/nominal/mnist.meta.minimal.arff \
        -split-percentage 80
Fine-tuning a model on a Custom Dataset
The previous section is a useful walkthrough if you're training a model on a dataset which already has an .arff file correctly defined. For most use-cases 'in the wild', however, this is not the case; a more common case for image classification is a 'folder organised' dataset format - images are sorted into subfolders, with the class name being the subfolder name. This format is intuitive and easy to work with but cannot be loaded directly into WEKA without a few extra steps.
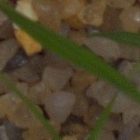
The dataset used in this tutorial is from the Plant Seedlings Classification competition on Kaggle, which is supplied in the tutorial asset folder.
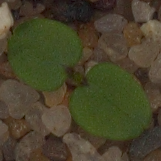
Loading a dataset in without an .arff file - Introduction to the ImageDirectoryLoader
This dataset is uses a common 'folder organised' format - images are sorted into subfolders, with the class name being the subfolder name. This format is intuitive and easy to work with but cannot be loaded directly into WEKA without further processing.
WekaDeeplearning4j comes with the ImageDirectoryLoader, a simple tool which creates an .arff file from a 'folder organised' dataset.
GUI Usage
The ImageDirectoryLoader can be invoked by selecting a folder instead of a file from the Open file... menu, from the Preprocess panel.
- Click
Open File...and navigate to theimages/folder in the Plant Seedlings dataset.
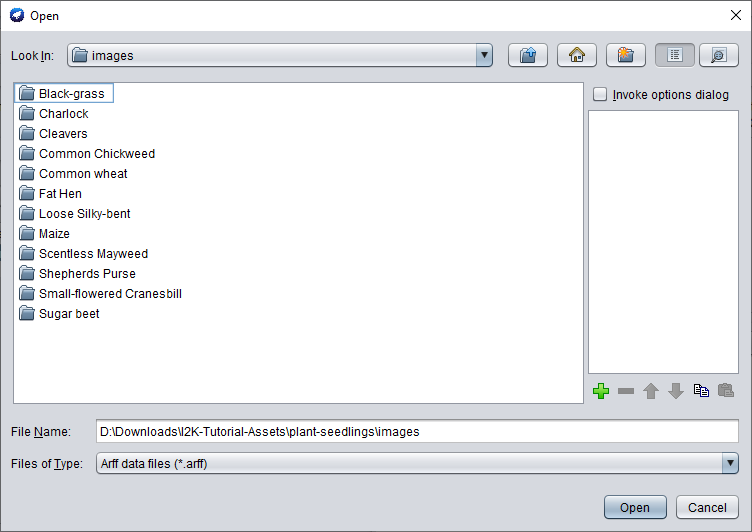
- Click
Ok, then on the next dialog clickChooseand choose theImageDirectoryLoader.
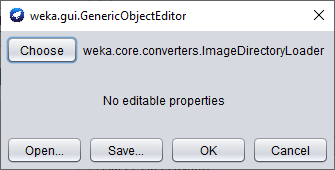
- There are no settings to change so simply click
OKto run - you should be taken back to thePreprocesspanel with your instances now loaded.
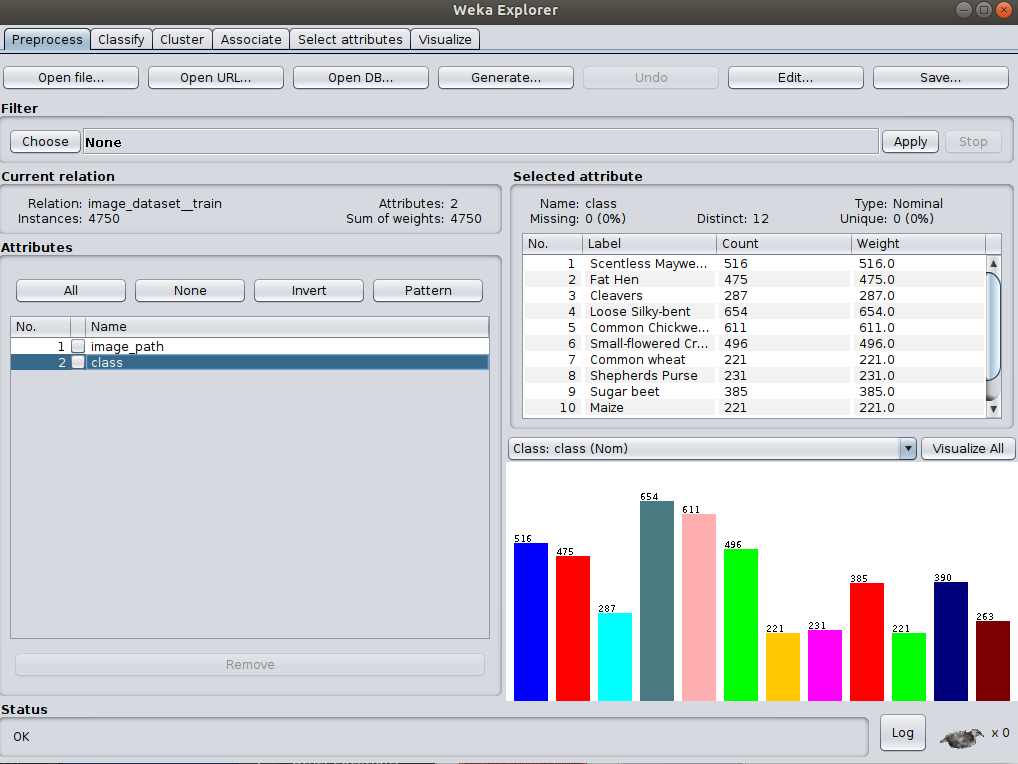
The ImageDirectoryLoader loads the dataset into the 'meta' format similar to the MNIST dataset we used above.
Commandline Usage
The tool can also be run from the command line
java weka.Run .ImageDirectoryLoader -i <input dataset path> -name <output arff filename>
e.g.:
java weka.Run .ImageDirectoryLoader -i /path/to/plant-seedlings/data/train -name plant-seedlings-train.arff
The associated meta .arff file has been created at the path specified and can be loaded into WEKA just as any other .arff file.
As we're simply checking accuracy within WEKA, we won't load in the test/ data and submit it to Kaggle - that is outside the scope of this tutorial.
Training - GUI
Now that we've loaded our custom dataset, we can get back to setting up our model.
- If you haven't already, set
Dl4jMlpClassifieras theClassifierand select theImageInstanceIteratorasinstance iterator. - In the
ImageInstanceIteratorsettings, set theimages locationto theimages/directory in theplant-seedlingsdataset folder. - As we'll be using a larger model than before, your machine may not be able to handle a
batch sizeof64. Set it to8for now. We'll be using a pretrained model (which has a fixed input size) so the width, height, and number of channels don't need to be set.
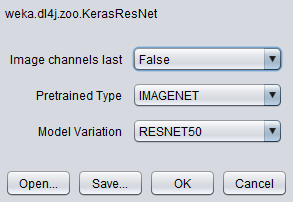
For the sake of this example, we'll use the tried-and-tested ResNet architecture.
- Select
KerasResNetfrom thezooModeloption.
Note that by default, the layer specification is not loaded in the GUI for usability reasons;
loading the layers every time an option is changed can slow down the GUI significantly. If, however, you'd like
to view the layers of the zoo model you've selected, set the Preview zoo model layer specification in GUI flag to true.
The above setup, trained for 20 epochs with a batch size of 16 produces a classification accuracy of 94.51% on the test data (your results may vary).
Correctly Classified Instances        1497               94.5076 %
Incorrectly Classified Instances        87                5.4924 %
Kappa statistic                          0.9392
Mean absolute error                      0.01
Root mean squared error                  0.0894
Relative absolute error                  6.6502 %
Root relative squared error             32.5587 %
Total Number of Instances             1584

=== Confusion Matrix ===

   a   b   c   d   e   f   g   h   i   j   k   l   <-- classified as
  44   0   0   0   6   0  38   0   0   0   0   0 |   a = Black-grass
   0 128   0   0   0   1   0   0   0   1   0   0 |   b = Charlock
   0   0  92   2   0   0   0   0   0   0   0   2 |   c = Cleavers
   0   1   0 202   0   0   1   0   0   0   0   0 |   d = Common Chickweed
   2   0   0   0  69   0   2   0   0   0   0   1 |   e = Common wheat
   1   0   1   0   1 154   0   0   0   0   0   1 |   f = Fat Hen
  11   0   0   0   0   0 206   0   1   0   0   0 |   g = Loose Silky-bent
   0   0   0   0   0   0   3  71   0   0   0   0 |   h = Maize
   1   0   0   0   0   0   0   0 171   0   0   0 |   i = Scentless Mayweed
   0   0   0   1   0   0   0   0   5  71   0   0 |   j = Shepherds Purse
   0   0   0   0   0   0   1   0   0   0 164   0 |   k = Small-flowered Cranesbill
   0   1   0   2   0   0   0   0   0   0   0 125 |   l = Sugar beet
Training - Commandline
$ java weka.Run \
    .Dl4jMlpClassifier \
    -S 1 \
    -iterator ".ImageInstanceIterator -imagesLocation plant-seedlings/data/train -bs 8" \
    -zooModel ".KerasResNet" \
    -numEpochs 1 \
    -t plant-seedlings/data/train/plant-seedlings-train.arff \
    -split-percentage 80
// Load all packages so that Dl4jMlpClassifier class can be found using forName("weka.filters.unsupervised.attribute.Dl4jMlpClassifier")
weka.core.WekaPackageManager.loadPackages(true);

// Load the dataset
weka.core.Instances data = new weka.core.Instances(new FileReader("/home/rhys/Documents/git/kaggle-competitions/plant-seedlings/data/train/output.arff"));
data.setClassIndex(data.numAttributes() - 1);
String[] classifierOptions = weka.core.Utils.splitOptions("-iterator \".ImageInstanceIterator -imagesLocation /home/rhys/Documents/git/kaggle-competitions/plant-seedlings/data/train -bs 16\" -zooModel \"weka.dl4j.zoo.KerasResNet -variation RESNET152V2\" -config \"weka.dl4j.NeuralNetConfiguration -updater \\\"weka.dl4j.updater.Adam -lr 0.1\\\"\" -numEpochs 20");
weka.classifiers.AbstractClassifier myClassifier = (AbstractClassifier) weka.core.Utils.forName(weka.classifiers.AbstractClassifier.class, "weka.classifiers.functions.Dl4jMlpClassifier", classifierOptions);

// Stratify and split the data
Random rand = new Random(0);
Instances randData = new Instances(data);
randData.randomize(rand);
randData.stratify(5);
Instances train = randData.trainCV(5, 0);
Instances test = randData.testCV(5, 0);

// Build the classifier on the training data
myClassifier.buildClassifier(train);

// Evaluate the model on test data
Evaluation eval = new Evaluation(test);
eval.evaluateModel(myClassifier, test);

// Output some summary statistics
System.out.println(eval.toSummaryString());
System.out.println(eval.toMatrixString());
Rapid Prototyping
One difficulty with rapid prototyping in ML is that large datasets & models can increase your iteration time, slowing down development. Following are some useful techniques to avoid this:
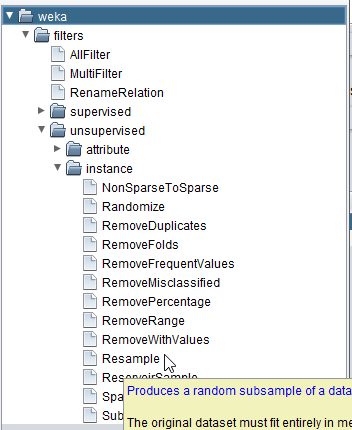
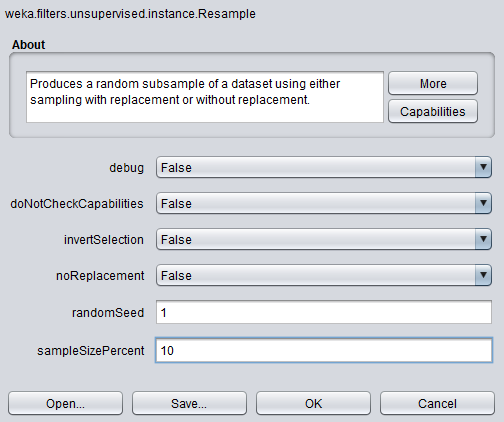
Dataset Resampling
Using the Resample filter, we can randomly take out instances from our dataset while roughly preserving the class balance (how many images are in each category).
- In the
Preprocesspanel, select theResamplefilter:
- Set the
sampleSizePercentto a value <100:
- Click
Applyto resample the dataset down to your specified size.
Reduce Training Epochs
As we're getting to modern CNN architectures, their size becomes large and training takes a long time. We can reduce the training time during experimentation, and then easily scale it back up once we've decided on the configuration.
- In the
Dl4jMlpClassifiersettings, changenumber of epochsto1
We're now ready for a short training run.
- Keeping the same
80%split, clickStart
Even with the smaller dataset, training on CPU with such a sizable model (KerasResNet) can take a while (~20-30 minutes). Once you've got the model to begin training successfully, feel free to move on to the other sections of the tutorial if you find yourself waiting here for a long time.
Further Experiments
We've introduced a few new features already, so now is the time to do some exploration of your own. Below are some suggestions for things to try out - try improve the accuracy over what we achieved with defaults.
- Custom Dataset - if you've got your own dataset, try loading that into WEKA for your exploration. If not, feel free to use one of the other datasets provided in the asset pack.
- Custom Layer architecture - Designing neural network architectures is an open research area which we only briefly touched on so now's the time to try creating your own model and getting a feel for CNNs. Start with a blank
Dl4jMlpClassifierand create your own architecture; you may like to refer to the model summaries for some inspiration. - Different Zoo Models - After trying to create your own model, try out some of the different models (and variations) available in the Model Zoo.
- Hyperparameter tuning - Part of becoming a competent deep learning practitioner is having an intuition for training hyperparameters and the effect it has on a model's overall accuracy. Try altering some parts of the
Dl4jMlpClassifierconfig, e.g. with your custom model architecture, try different numbers of epochs (10, 20, 30, 40, 50). You can also try theGridSearchandMultiSearchpackages in WEKA to automatically search for the optimal hyperparameters.